Pages

Monday, January 31, 2011

Butter Chicken


We made this yummy dish last night for our friend's Scott and Katie who recently announced they are expecting their first child!  We were so excited and wanted to celebrate their good news over a meal with friends.

Left to right: Scott, Katie, Chris, Alex, Doug, Summer, and Jessica

I found this recipe a few weeks ago on the Pioneer Woman's website.  She has a section called Tasty Kitchen where other people can post recipes on her website.  She posted, on her cooking blog, her top favorites from Tasty Kitchen.

I wasn't sure why this was called Butter Chicken.  Yes, you use some butter in the recipe, but why not tomato chicken???  When Katie got to our house last night she saw the recipe laying out and commented that she had butter chicken before at a Indian restaurant.  It made me curious so I did a little research.  Here is what I found on wikipedia about Butter Chicken.

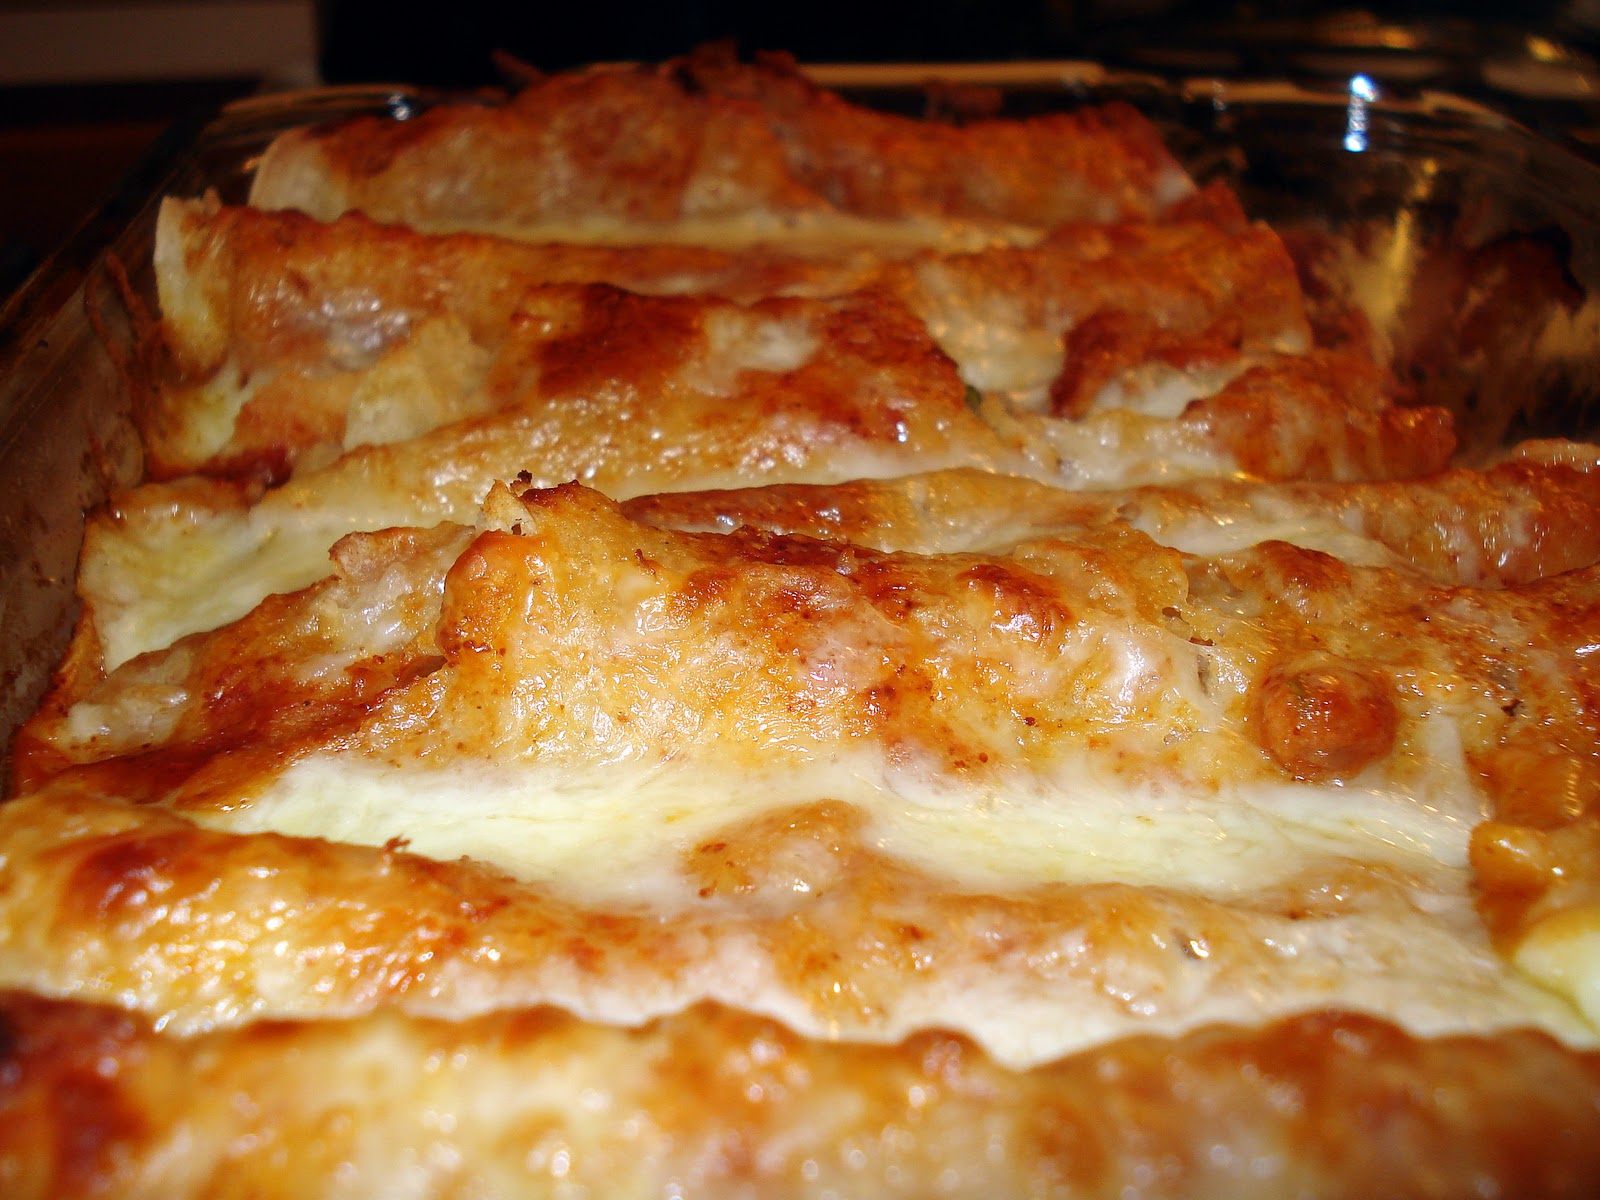
The dish was delicious.  You do need to prep the chicken the morning of or the night before.  After that you just throw it all together and serve over rice.  We also had a cesar salad for a side dish.

This was my first time cooking with cardamom.  It added a nice flavor.  It isn't hard to find.  I found it in the spice section at Publix.

Yum, I can't wait to heat up the left overs as soon as I am done typing this up!

I doubled this for all our guests.
I spy a four legged friend in the background.  That would be our cat Callie.

Butter Chicken
Source : Pioneer Woman's Tasty Kitchen

Ingredients:

  • 4 pieces of boneless skinless chicken breasts (cut into bite size pieces)
  • 5 cloves of garlic, minced
  • 1 tsp. salt
  • 1/2 tsp. black pepper
  • 1/2 tsp. cayenne pepper
  • 1/4 tsp. ground coriander
  • 1/4 tsp. cumin
  • 1/4 tsp cardamom
  • 1 whole lime, juiced
  • 1 whole onion, diced
  • 1/4 cup butter
  • 1 can (14.5 ounces) tomato sauce
  • 1 can (14.5 ounces) diced tomatoes
  • 1 pint whipping cream
  • 1 bunch of chopped cilantro, to taste
  • 2 cups basmati rice
Directions:

Combine the first 9 ingredients and marinate overnight.  (I made it in the morning for dinner that night).

Saute the onion in the butter until soft.  Add marinated chicken and cook about 10 minutes.  Add the tomato sauce and diced tomatoes.  Cook for 30 minutes over medium low heat with the lid on.  Add the whipping cream and cilantro just before serving over basmati rice.  

Thursday, January 27, 2011

Cesar Salad Dressing


I love cesar salads!  I found this recipe, right after Alex and I got married, in a cook book I got at a shower from Williams-Sonoma.  In the beginning of our marriage I always tried new things and about 50% of the time they came out awful.  I am sure Alex thought this was going to go the same way.  Neither of us had ever made anything with anchovies.  When we made the first batch we were amazed at how delicious it was!  It set the bar high for getting cesar salads at restaurants.  As a matter of fact, I rarely order them out anymore because it just isn't as good.


I made this last night for a dinner at my friend Diana's house.  She hosted a girls night. I signed up for salad and decided to make old faithful.  She made stuffed peppers and cheese risotto.  I do not like peppers, but I loved the stuffing!  The risotto was awesome too.

Anchovies can be found by the canned tuna at your local grocery store.  They are not fun to handle so I just throw them in a bowl and mash them up without thinking about them too much.

We used to make the homemade croutons, but don't anymore now that I am gluten free.  I will include how to do it though.  If you like croutons I would definitely make these.  They are great and easy.

Serve over romaine lettuce.

My good friend Lauren recently posted a yummy looking recipe for using cesar dressing on tilapia.  You can find it here.

I doubled this recipe for ~8 people.


Cesar Salad Dressing
Source:  Williams-Sonoma Simple American Cooking
Ingredients:

  • 1 clove of garlic
  • 1/2 cup extra virgin olive oil
  • 6-8 good quality anchovy fillets in olive oil, drained
  • 1 1/2 tsp dry mustard
  • 2 tbsp. fresh lemon juice (approximately 1 lemon)
  • 1 1/2 tbsp plain yogurt
  • 1/2 cup freshly grated parmesan cheese
  • Ground pepper
Chop the garlic and combine with the 1/2 cup olive oil in a blender.  Puree until smooth.  In a small bowl, using a fork, mash the anchovies until they form a paste.  Add to the oil and garlic in the blender along with the mustard, lemon juice, and yogurt.  Blend at a high speed until a smooth emulsion forms.  Add 2 tbsp. of parmesan cheese and blend again.  Season with a little salt if needed.  The anchovies should provide enough.  Add a little pepper.  

Croutons
Ingredients:
  • 3 or 4 slices of french or italian bread ~ 1/2 inch thick
  • 3 tbsp. extra virgin olive oil
  • 1 garlic clove, minced
Remove the crusts from the bread slices and discard.  Cut the bread into 1/2 inch cubes.  You should have approximately 2 cups.

In a large frying pan over low heat, warm the 3 tbsp. olive oil.  Add the garlic and saute for 1-2 minutes.  Add the bread cubes and fry, stirring and tossing, until crisp and golden on all sides, 4-5 minutes.  Sprinkle the bread cubes with a little salt.  Transfer to paper towels to drain.  Set aside to cool. 

Wednesday, January 26, 2011

Blackened Tilapia


This really doesn't deserve a blog entry of it's own, but I know some of you really don't enjoy cooking!  You are just a good friend and read my blog to be nice.  This is a super cheap and easy dinner to throw together.

I bought 2 lbs. of tilapia with the intention of freezing half for another time and using half for the fish tacos we made this weekend.  Well, I stuck all of it in the freezer and forgot to separate it out.  When I took them out to defrost I tried to pry them apart, but it didn't work.  I was stuck with 2 lbs. of tilapia.  We ate the first pound for dinner Saturday and lunch Sunday.  Last night I wanted to go ahead and cook the rest to eat for dinner and lunch this week.  The fish tacos were so good and we had left over condiments so I debated about just making another round with the second lb.  I didn't feel like chopping garlic and cilantro last night so instead I put some olive oil and blackening seasoning on them with a little cumin and garlic powder, delicious.  I plan on cooking some rice tonight and taking the rest to work tomorrow for lunch.

You can buy pre-made blackening seasoning or make your own.  Sprinkle on both sides of tilapia.  Drizzle with a little olive oil.  Bake at 350 degrees until meat thermometer reads 137 degrees or approximately 20-25 minutes.  Pair it with steamed veggies or rice.


Blackening Seasoning
Source:  Southern Food at About.com
Ingredients:
  • 4 tsp. dried thyme
  • 2 tsp. paprika
  • 2 tsp onion powder
  • 2 tsp. garlic powder
  • 1 tbsp. granulated sugar
  • 2 tsp. salt
  • 2 tsp. black pepper
  • 1 tsp. ground cayenne pepper
  • 1 tsp. dried oregano
  • 3/4 tsp. ground cumin
  • 1/2 tsp. ground nutmeg
Mix it all together and store in a cool dry place.  

Sunday, January 23, 2011

Fish Tacos


Don't be alarmed, I found ANOTHER Mexican recipe to blog on!  Alex and I eat Mexican a lot.  Normally we split a dish of either Tacos de Carne Asada or Fish Tacos.  I was excited to find this recipe in hopes that maybe we can save a little by eating at home more.

This was my first time making fish tacos.  They were great.  We were blessed to have my in-laws over for dinner.  They are so fun and we always have great conversation.  My mother-in-law (Susan) has never tried fish tacos before.  She said they just sounded wrong.  She was pleasantly surprised by how much she like them. She said she will definitely try them when she goes out to eat from now on.

This was taken at Thanksgiving.  
Pop (Alex's Grandpa), Susan (Mother-in-law), Alex, Me, Dakin (Father-in-law)
Tucker had to make an appearance too!

This was a very simple recipe to throw together and healthy too.  We served it with black beans (one can of black beans, one small onion chopped, one garlic clove chopped, 1 tbsp cilantro chopped, 1/4 tsp cayenne pepper, and salt to taste.  Combine all except the last three in a pot, bring to a boil and reduce heat to low until ready to serve, mix in last three ingredients before serving).

I was surprised to see the original author served these with flour tortillas.  Most places always serve fish tacos on corn tortillas.  This was our obvious choice due to being gluten free.


White Fish Tacos
Source:  Adapted from Annie's Eats
Servings: ~8 tacos

Ingredients:
For the fish:

  • 2 tbsp. freshly squeezed lime juice (approximately 2 limes)
  • 3 tbsp. extra virgin olive oil, divided
  • 3 tbsp. cilantro minced
  • 1/4 tsp. cumin
  • 2 cloves garlic minced
  • 1 lb. white fish (we used tilapia, but halibut, cod etc. would be fine)
  • Salt
For the cilantro cream sauce:
  • Juice of 1 lime
  • 2 tbsp. cilantro minced
  • 6 oz. of sour cream (or nonfat greek yogurt)
  • 1 clove garlic, minced
  • pepper to taste
For toppings:
  • Cherry tomatoes sliced (we omitted this because my picky husband can't stand them)
  • Green onions chopped
  • Red cabbage, shredded
  • Cilantro, minced
  • Serve on corn tortillas (or flour)
Directions:

Combine the lime juice, 2 tbsp. of the olive oil, cilantro, cumin, and garlic in a shallow dish.  Whisk together until well blended.  Place the fish in the mixture, turning to coat.  Let marinate 15-30 minutes.

Meanwhile, prepare the cilantro cream sauce.  Combine the lime juice, cilantro, greek yogurt, garlic and pepper in a small bowl.  Mix until well blended.  Refrigerate until ready to use.

Heat the remaining 1 tbsp. olive oil in a large skillet over medium high heat.  Place the fish in the pan and cook without disturbing, 3 minutes.  Flip the fish and cook on the second side 3 minutes more.  Remove to a plate, season with salt as desired, and let rest for a few minutes.  Shred the fish into bite sized pieces with two forks.

I warmed the corn tortillas in a pan with a small amount of olive oil.  

Assemble tacos on corn tortillas with shredded fish, cilantro cream sauce, and additional toppings as desired. 

Thursday, January 20, 2011

Thai Honey Peanut Chicken


This was delicious!  I normally lean towards the Thai dishes made with chili sauce vs. peanut type sauces, but this did not disappoint.  Great flavor with just a little Thai kick at the end.

I used natural peanut butter.  If you use regular (Jiff, Skippy, etc) instead of natural reduce the honey by 1 tbsp.

I let this marinate for over 24 hours.  We were supposed to make it last night, but Alex found out yesterday that his fractured finger needed a few screws today.  He decided he needed a "man meal" at Longhorns instead of this for dinner.  So being the good wife I am, I agreed!

It was super easy to make.  I was thankful for a quick meal so I could get back to tending to my post-operative patient that is lying on my couch.  We served it with steamed broccoli topped with a little soy sauce and basmati rice.  Enjoy!


Thai Honey Peanut Chicken
Source:  Pioneer Woman's Tasty Kitchen Blog

Ingredients:
  • 1 lb. chicken cut into pieces
  • 1/4 cup soy sauce
  • 2 tbsp. honey
  • 1 tbsp. lime juice
  • 1 large clove garlic
  • 1 heaping tbsp. natural peanut butter
  • 1/2 tsp. curry powder
  • 1 tsp. sriracha (thai hot sauce, this is optional, but highly recommended)
Directions:

Mix ingredients and marinate chicken in a bowl for 2-3 hours (or 24+:))

Cook chicken and the marinade over medium high heat for 7-8 minutes or until chicken is done.  Reduce heat to medium low and add precooked veggies if desired.  Serve topped with sesame seeds.


Tuesday, January 18, 2011

Chicken Tortilla Soup

Bad picture, but I promise it tastes great!

While I was snowed in last week I made our menu for this week.  I thought this soup would hit the spot with the cold weather.  I love how you can make it your own with all the different toppings you can add.  This is a great Sunday soup to make since you need a little time for it to cook.

I am sitting here now, snacking on some pistachios, wishing I had a bowl of this soup in front of me!  You get hungry at 10AM when you get up at 5AM.

I made two batches of this soup.  One for my small group co-leader who just had her 5th child right after Christmas.  We lead a group of freshman girls at InsideOut which is the high school ministry at North Point Community Church.  Our girls are awesome!  We have 21 total.  We meet once a week on Sunday evenings for a service just for the high school students.  We then break off and have small group time where we discuss questions from the service.  I also have the pleasure of hanging out with them outside of group too.  We are having a pancake breakfast this weekend which will be so fun!  I get to see these girls grow in their faith over the next four years.  What an awesome experience!  

The other batch was for my other small group.  My husband and I also lead a married couples small group.  We formed this group from close friends.  There have been some changes lately in group members so we wanted to host a dinner with the "new" group and allow everyone some social time to get to know each other.  We had a great time over a great meal.  Lauren made a yummy batch of gluten free Mexican brownies for dessert.  She said she would post the recipe soon so here is a link to her blog.

As I have mentioned many times, I do not like bell peppers so I omitted them from this recipe and it was still great.  Feel free to play with the toppings.  I read the original reviews and everyone said you definitely should add some lime to the finished product.  I agree!  Great flavor!

I cut the tortilla strips and sprayed them with PAM and placed them in the oven at 350 for about 6 minutes then under the broiler for about 1 minutes to make them crisp.  This step is not necessary since you will be putting them in soup and they will get soggy, but I like it anyway:)

Source:  The Pioneer Woman
Servings:  8

Ingredients:

  • 2 whole chicken breasts
  • 2 tbsp. olive oil, divided
  • 1 1/2 tsp. cumin
  • 1 tsp. chili powder
  • 1/2 tsp. garlic powder
  • 1/2 tsp. salt
  • 1 cup diced onion
  • 1/4 cup diced green bell pepper
  • 1/4 cup diced red bell pepper
  • 3 cloves garlic minced
  • 1 can rotel tomatoes and green chilies
  • 32 ounces low sodium chicken broth (I used 2-14.5 oz cans because that is what we had in the pantry)
  • 3 tbsp. tomato paste
  • 4 cups hot water (just let the tap water run until hot)
  • 2 cans black beans rinsed and drained
  • 3 tbsp. cornmeal or masa
  • 5 whole corn tortillas, cut into strips about 2-3 inches
  • Optional toppings: sour cream, diced avocado, diced red onion, salsa or pico, grated cheese (monterey jack, cheddar), cilantro, and definitely lime.
Directions:
Preheat oven to 375 degrees.  

Mix cumin, chili powder, garlic powder, and salt.  


Drizzle approximately 1 tbsp. olive oil on chicken breasts, then sprinkle a small amount of spice mix on both sides.  Set aside the rest of the spice mix for later.  Place chicken breasts on a baking sheet.  Bake for 20-25 minutes or until your meat thermometer says they are done.  


Use two forks to shred chicken.  Set aside.


Heat 1 tbsp. of olive oil in a pot over medium heat.  Add onions, peppers, and minced garlic.  


Stir and begin cooking, then add the rest of the spice mix.  


Stir to combine, then add shredded chicken and stir.  


Pour in rotel, chicken stock, tomato paste, water, and black beans.  Bring to a  boil, then reduce heat to a simmer.  Simmer for 45 minutes, uncovered.  


Mix cornmeal with a small amount of water.  


Pour into soup, then simmer for an additional 30 minutes.  Check seasonings, adding more if needed.  I added a few more shakes of all (chili powder, garlic powder, cumin, and salt).  Turn off heat and let it sit for 15 to 20 minutes.  Add tortilla strips before serving.  Serve and add toppings.  Enjoy!

Sunday, January 16, 2011

Ginger Beef Stir Fry


I love making stir fry.  It is a great way to clean out your refrigerator.

We made this recipe with ribeye vs. sirloin because it is what we had in the freezer.

I do not like red peppers, which the original recipe called for, so I added more broccoli and carrots.  Use whatever you have at home: mushrooms, peppers, onions. etc.  You can make this with chicken instead of beef or even make it vegetarian and leave out the meat all together.  Once you have the basic ingredients on hand this is an easy go to meal during the week.

We added the chopped peanuts and they gave it a great texture.

When using green onions I typically use the whole thing, green and white parts.  We were fortunate enough to have some fresh garlic grown in my father-in-laws garden.  Have I ever mentioned I love garlic:)

I topped mine with a little extra soy sauce and some sriracha (thai hot sauce).


I used basmati rice as a side.

Just a few pics of our sweet dogs.  Jackson is always trying to get some love/attention even while we eat.  Tini is always looking for food.  She pretends she could care less that you are sitting there eating, all the while hoping that maybe something will fall off your plate.


Ginger Beef Stir Fry
Source: Annie's Eats

Ingredients:

  • 1 tsp. cornstarch
  • 1/4 cup cold water
  • 3 tbsp. plum sauce
  • 1 tbsp. grated fresh ginger
  • 1 tbsp. low sodium soy sauce
  • 1/4 tsp. red pepper flakes
  • 1 lb. boneless sirloin steak, cut into thin strips
  • 1 tbsp. vegetable or canola oil
  • 1 red bell pepper, seeded and sliced thin
  • 1 1/2 cup small broccoli florets
  • 1 carrot, peeled and cut
  • 4 green onions, chopped
  • 1 clove garlic, minced
  • 3 tbsp. salted peanuts, chopped (optional)
  • Rice for serving
  • Sesame seeds for garnish
In a small bowl, combine the cornstarch and water; whisk until smooth.  Next add, plum sauce, ginger, soy sauce, and red pepper flakes.  Stir and set aside.

In a large skillet or wok cook steak strips over medium high heat until no longer pink.  Remove to a plate and set aside, draining excess fat from the skillet if necessary.  Add the oil to the skillet and heat through.  Add the red pepper, carrots, and broccoli (or any vegetables of your choice) and stir fry until crisp-tender, about 5 minutes.  Mix in the green onion and garlic and cook just until fragrant, about 30 seconds.  Return the steak pieces to the pan.  Add the sauce to the pan, stirring well to coat everything.  Cook until slightly thickened, about 2 minutes more.  Stir in the peanuts and serve over rice.

Sprinkled with sesame seeds.

Saturday, January 15, 2011

Bacon and Parmesan Pasta


This was another "snow meal" that we made while stuck at home this week.  It was super fast and easy to throw together.

We both thought that the original recipe was a little bland.  My suggestion, definitely add some garlic.  Sautee it in a pan and add it to the final mixture.  I topped mine with a few more red pepper flakes because I like some heat.  Since we did not originally add garlic I sprinkled some garlic salt on top and it was perfect!

I made this with some brown rice pasta I found at Trader Joe's.  I thought it tasted great, unlike some of the other rice pastas we have tried.  Rice pasta typically doesn't hold up as well as regular or other gluten free pastas.  Alex didn't love the texture of the rice pasta.  We also did not have heavy cream so I used half and half.

This is not the healthiest recipe, but it is very satisfying.  We steamed some fresh broccoli, topped it with lemon zest, lemon juice, and a little olive oil for a healthy side dish.


Bacon Parmesan Pasta
Source:  Adapted from Pioneer Woman's Tasty Kitchen
Ingredients:


  • 1 lb. bacon
  • 1/4 tsp. crushed red pepper flakes
  • 1 lb. rigatoni or penne pasta
  • 1/2 cup heavy cream
  • 1/4 cup cream cheese
  • 1/4 cup grated parmesan cheese (I only had shredded on hand)
  • 2 whole eggs
  • 1/4 tsp ground pepper
  • 1 garlic clove minced
Directions:
Cook pasta according to package directions.

Cook the bacon per package instructions.  When the bacon is almost complete, sprinkle with red pepper flakes.  Transfer to a plate to cool.  

My addition:  sautee garlic for 30 seconds and set aside.

Place cream and cream cheese in a sauce pan.  Heat over low until cream cheese is melted.  Remove from heat.  Add parmesan cheese, egg, pepper, and garlic and whisk until blended.  (Don't worry the heat from the pasta cooks the egg).

Drain the pasta and immediately mix with sauce and bacon.  Stir and serve.

Again, I topped with more shredded parmesan and red pepper flakes.

Tuesday, January 11, 2011

Cornbread


I finally broke down and bought a gluten free flour.  I have avoided baking since I have been gluten free because most recipes call for so many different flours that I do not have.  I was making veggie chili and craving some cornbread.  I found a recipe that looked pretty simple so I tried it out.  Alex and I thought it tasted better than the regular kind so don't be afraid to make it even if you are not gluten free.

I believe it is a sin in the south not to make your cornbread in a cast iron skillet.  If you have one, dust it off and pull it out, if you do not then it is time to invest in a kitchen tool you can pass on for generations to come!

It is so pretty outside right now that I just have to show you!


Nothing says chili and cornbread better than a cold day.  Hope you enjoy!


Source:  www.glutenfreemommy.com

Ingredients:

  • 1 cup white rice flour
  • 3/4 cup stone-ground cornmeal
  • 2 to 3 Tbsp. of sugar (if you are from the south just go ahead and put three, you know cornbread is supposed to be sweet)
  • 2 1/2 tsp baking powder
  • 3/4 tsp salt
  • 1 Tbsp. butter
  • 2 beaten eggs
  • 1 cup milk
  • 1/4 cup melted butter
Directions:

Preheat the oven to 400 degrees.  Mix the dry ingredients (flour, cornmeal, sugar, baking powder, and salt) together in a medium bowl and set aside.

Melt the one tablespoon of butter in a 10 inch cast iron skillet or 8/9 inch round baking pan in the oven.  This takes about three minutes.  Swirl the butter around the pan coating the bottom and sides.

In a small bowl, combine the eggs, milk, and 1/4 cup butter.  Add this mixture all at once to the flour mixture and stir until just moistened.  Pour batter int o the hot skillet or baking pan.  Bake for 15-20 minutes or until a wooden toothpick comes out clean.  Serve warm.  

Monday, January 10, 2011

Veggie Chili


I am so grateful for this snow day.  I am not good at just relaxing, but this will force me to just chill out at home.  I stocked up on food this weekend like all the other crazy people at the grocery store.  I decided to make this veggie chili I saw in my Southern Living magazine for company that we had coming over last night.  Our good friends, Kristen and Cody, are adopting a sweet baby girl from China.  We wanted to hear about all the latest updates over a warm meal.  Here is a link to her blog about Mae.  Such a sweet story.  Kristen is dairy free/does not eat red meat and I am gluten free.  As you can imagine this makes for a limited menu.  Luckily this chili hit the spot!

Kristen all ready to brave the drive home in the snow.

As with all recipes I have to change up something.  For starters I used organic carrots which are smaller than normal carrots so I used four instead of two.  It also called for a chili seasoning kit.  I have never seen a kit so I just bought the chili seasoning packets from Sam's.  It turned out the first ingredient was whole wheat so that wouldn't work.  Alex ran back out to the store for me and found a Tex-Mex chili packet that was gluten free.  We used three of those packets instead of the one chili seasoning kit the recipe called for.  This chili turned out to be a big hit.  Everyone loved how hearty it was even though there was no meat.  I also made gluten free cornbread that was awesome.  I will be blogging on that soon!

A quick note on organic fruits and vegetables.  Organic fruits and vegetables have not been sprayed with pesticides.  The research has shown that even after washing fruits and vegetables that pesticides still remain on non-organic foods.  There is no research on the long term affects that this might have on our health, but I feel  it makes sense to eat organic.  I have always understood you should buy organic things that you can not peel.  Things that we peel, bananas, oranges, lemons, etc. are fine to buy non-organic.  Here is an article explaining the same thing.

I did not use the French's Chili packet shown, but the Tex Mex one instead.


Ingredients:
  • 2 large carrots, diced (or 4 small carrots)
  • 1 medium onion, diced
  • 1 Tbsp. vegetable oil
  • 3 1.25 oz packets of Tex Mex Chili Seasoning (any kind would work or if you find the chili seasoning kit use that)
  • 1 8oz. can tomato sauce
  • 3 cups tomato juice
  • 2 14.5 oz cans diced tomatoes, undrained
  • 2 15 oz cans black beans, drained and rinsed
  • 2 15 oz cans great Northern beans, drained and rinsed
  • 1 large zucchini, chopped
  • 1 yellow squash, chopped
  • 1 cup frozen whole kernel corn (I used white shoepeg because that was already in the freezer)
Directions:

Saute carrots and onions in hot oil in a 5 to 6 qt Dutch oven over medium heat 7 minutes or until onions are translucent.  If using the chili seasoning kit, stir in half of the red pepper packets and all remaining packets.  If you are using the regular chili seasoning packets then dump all three in now.  Saute mixture 2 minutes.  Stir in tomato sauce and next 7 ingredients.  

Bring to a boil; cover, reduce heat to medium low, and simmer, stirring occasionally, 30 minutes or until vegetables are tender.  Serve with desired toppings.  We used sharp white cheddar cheese and cilantro.  You could also use sour cream, chopped green onions, and chopped tomatoes.  

Thursday, January 6, 2011

Chicken Enchiladas


This recipe takes a while to make because everything is fresh down to homemade enchilada sauce.  It was well worth it.  Great flavor.  Perfect for entertaining because it makes a lot or leftovers for lunch all week!

Alex and I had so much fun making this dish.  We took advantage of some of the breaks by having a dance party in the kitchen.  See, cooking can make your marriage stronger:)

The jalapeños got me again!  My eyes burned for the next two mornings and nights while I was putting in/taking out my contacts.  One day I will learn to wear gloves or get smart and have Alex clean them up.

I loved that this recipe used white cheddar cheese.  Did you know the yellow cheddar cheese is yellow because of food dye?.  Here is an interesting site that explains why.

We made spanish green beans for our side and they are definitely not blog worthy so I won't waste your time!


Chicken Enchiladas
Source:  Annie's Eats

Ingredients:

  • 1 medium onion, chopped fine
  • 2 jalapeños, seeded and chopped fine
  • 1 tsp. canola oil
  • 3 cloves garlic, minced
  • 3 tbsp. chili powder
  • 2 tsp. cumin
  • 1 tbsp. sugar
  • 1 15oz. can tomato sauce (another good Sam's bulk buy)
  • 1 cup water
  • 1 tomato seeded and chopped
  • salt and pepper
  • 1 lb. boneless, skinless chicken breasts (approximately 2 if you have the big frozen bag like us)
  • 1 cup shredded sharp white cheddar cheese, divided (I don't think it would kill you if you already have the yellow stuff on hand)
  • 1 cup shredded monterey jack cheese, divided
  • 1/2 minced fresh cilantro
  • 12 (6 inch) soft corn tortillas
  • cooking spray
Directions:
Combine the onion, jalapeño, and oil in a large saucepan over medium heat.  Cook, stirring often, until the onions and peppers have softened, 8-10 minutes.  Stir in the garlic, chili powder, cumin, and sugar, and cook just until fragrant, less than 30 seconds.  Mix in the tomato sauce, water, and chopped tomato.  Bring the sauce to almost a boil, lower the heat and cook until slightly thickened, about 5 minutes.

Nestle the chicken into the sauce.  Reduce the heat to low, cover, and cook until the chicken is completely cooked through (160 degrees), about 12-20 minutes (ours took a little longer, just keep a thermometer in it or take it out and cut it to see how it is doing).  Transfer the chicken to a plate and set aside to cool.  

Strain the sauce through a large mesh strainer into a medium bowl, pressing down on the onions and tomatoes to extract as much liquid as possible.  Transfer to reserved solids to a large bowl and set aside.  Season the sauce with additional salt and pepper to taste.

Shred the chicken into bite size pieces and add to the bowl with the onion mixture.  Add in 1/4 cup of the enchilada sauce, 1/2 cup of each of the shredded cheeses, and the cilantro.  Stir to combine.

Preheat the oven to 425 degrees.  Oil a 9 x 13 baking dish with cooking spray.  Stack the tortillas on a plate, cover with plastic wrap, and microwave fro 40-60 seconds, until warm and pliable.  Spoon 1/3 cup of the chicken mixture evenly down the center of a tortilla.  Roll up the tortilla around the filling tightly, and place in the prepared baking dish, seam side down.  Repeat with the remaining filling and tortillas.

Lightly spray the tops of the enchiladas with cooking spray.  Place in the oven, uncovered, for 7 minutes or until the tortillas start to brown slightly.

Reduce the oven temperature to 400 degrees.  Remove the enchiladas from the oven and pour the sauce over the top.  Sprinkle with the remaining shredded cheese (and a little extra if you want!).  Cover the dish with foil and bake for 20 minutes.  (I would suggest spraying the foil with cooking spray before putting it on so the cheese does not stick to it like some of mine did).

Remove the foil and bake for 5 more minutes, until the cheese is browned.  Remove from the oven and let stand 10 minutes before serving.


Wednesday, January 5, 2011

Scallops


I found this recipe on a new blog I am following, Annie's Eats.  I have never cooked scallops before so I decided to be adventurous.  I probably never tried to cook them before because I don't think there is anything special about them.  I love shrimp, but I don't think these guys  have much flavor.  I loved all the other ingredients in this recipe and knew it would have an awesome flavor and it did!  Plus this main dish is super fast to make.  Perfect for a fast dinner after a long day at work.  

I bought sea scallops from Sam's in a 2lb. bag.  I was not sure how they would reheat if they were left over so I only defrosted a 1/2 lb.  It was a perfect serving for Alex and I.  I will actually be making round 2 of this recipe tomorrow.  Sea scallops are larger than bay scallops.  If you use bay then you can use them whole.  If you use sea then make sure to cut them in half horizontally so they are not so thick.  

I used corn starch instead of flour for gluten purposes.  I also have a few dairy free followers that I wanted to remind that Smart Balance has the following dairy free butter spreads:
Enjoy all of these dairy/lactose-free products:

• Smart Balance® Light Buttery Spread
• Smart Balance® Light Buttery Spread with Flax Oil
• Smart Balance® Organic Whipped Buttery Spread


We served these scallops with garlic rice pilaf and sauteed spinach.  It was a great date night meal!


Source:  Annie's Eats
Ingredients:
  • 1 lb. fresh bay or sea scallops
  • Kosher salt
  • Freshly ground pepper (we used the normal stuff)
  • All purpose flour for dredging (or corn starch if you are gluten free)
  • 4 tbsp. unsalted butter, divided
  • 1/2 cup minced shallots (about 2 large)
  • 1 clove garlic, finely minced
  • 2-3 tbsp. flat leaf parsley, minced (I used curly parsley because that is what I had, to me they all taste the same)
  • 1/3 cup dry white wine
  • 1 lemon, halved
Directions:

If using bay scallops leave them whole.  If using sea scallops, cut them in half  horizontally.  Season the scallops with kosher salt and black pepper, toss with flour or corn starch, and shack off the excess.  In a large skillet or saute pan, melt 2 tablespoons of the butter over  high heat until sizzling.  Add the scallops to the pan in a single layer.  Lower the heat to medium and allow the scallops to brown lightly on one side without moving. Then turn and brown lightly on the other side.  This should take about 3-4 minutes total.  Add the rest of the butter to the pan with scallops and let it melt.  Add the shallots, garlic, and parsley to the pan and saute for 2 more minutes tossing the ingredients with the scallops.  Add the wine to the pan and cook for 1 minute.  Serve with a squeeze of fresh lemon juice over the scallops.  

Tuesday, January 4, 2011

Garlic Rice Pilaf


This was another side we had with the scallops and sauteed spinach.  I love garlic!  Being gluten free I also love rice as a carb side dish.  This recipe takes some time to make, but was well worth it and can be reheated for lunch the next day.  You can pop it in the oven and give yourself time to work on your main dish or get some stuff done around the house.  I am all about multi tasking!  


Ingredients:  
  • 2 tbsp. butter
  • 3 cloves garlic, minced or pressed
  • 1 cup long grain white rice
  • 2 1/2 cups chicken broth, divided
  • 1/2 tsp. salt
  • 1/2 tsp. pepper
  • Squeeze of lemon juice
Preheat the oven to 375 degrees.  Have ready a covered casserole dish.  In a saucepan or skillet, melt the butter over medium high heat.  Add garlic and rice to the pan and cook until both are golden brown, about 3-4 minutes.  Stir in 1 cup of the chicken broth, salt and pepper and bring to a boil.  Pour the mixture into the casserole dish, cover, and bake for 25 minutes.  Stir in the remaining 1 1/2 cups chicken broth and bake, covered, for another 30 minutes.  Remove and stir in squeezed lemon.  Cover and finish baking for 15 minutes.  

Monday, January 3, 2011

Sauteed Spinach


After a long day yesterday I just wanted a healthy home cooked meal, and that is exactly what I got.  My husband and I worked together in the kitchen to make this dinner come together.  I love cooking with him!  We had scallops, sauteed spinach, and garlic rice pilaf.  I will blog on the scallops and rice soon!

We always have fresh spinach in the refrigerator for salads.  I never make cooked spinach because Alex doesn't really enjoy the texture.  I was craving this yummy green stuff and not in the form of a salad so I sauteed it.  These are simple ingredients to keep on hand for a healthy side.

The flavor was awesome!  Alex tossed a little too much salt on it when it was finished, but it still made for a great side dish!  It sounds like a large amount of spinach to cook, but it cooks down to a small amount perfect for about 4 people.


Garlic Sauteed Spinach
Source:  Barefoot Contessa

Ingredients:

  • 1 1/2 pounds baby spinach leaves
  • 2 tablespoons olive oil
  • 2 tablespoons chopped garlic (6 cloves)
  • 2 teaspoons kosher salt
  • 3/4 teaspoon freshly ground black pepper (we used the normal stuff:))
  • 1 tablespoon unsalted butter (could easily be left out to be dairy free)
  • lemon
Directions:

Rinse the spinach well in cold water to make sure it is very clean.  Spin it dry in a salad spinner leaving just a little water clinging to the leaves.

In a very large pot or dutch oven, heat the olive oil and saute the garlic over medium heat for about 1 minute, but not until it is browned.  Add all the spinach, the salt, and pepper to the pot, toss it with the garlic and oil, cover the pot, and cook it for 2 minutes.  Uncover the pot, turn the heat on high, and cook the spinach for another minute, stirring with a wooden spoon, until all the spinach is wilted.  Using a slotted spoon, lift the spinach to a serving bowl and top with the butter, a squeeze of lemon and a sprinkling of sea or kosher salt.  Serve hot.

Saturday, January 1, 2011

Salsa

I felt inspired to use my UGA chip and dip tray because the DAWGS were playing the Knights while I was making this salsa!  GOOO DAWGS, SIC EM!

Shocker, another Mexican type recipe:)  I love salsa!  I could eat salsa for three meals a day.  Some people love chocolate (which don't get me wrong, I do love that too), but I would rather be stuck on an island with just chips and salsa then chocolate any day!

I am ashamed to admit that this is my first attempt at making homemade salsa.  I would consider myself a pro at the store bought stuff, but I never tackled this challenge before.  I got this recipe from my January Southern Living Magazine.  This is like my cooking bible.  Every month when I get my new one I sit down and read all the recipes.  I turn the page corners down for the ones that I like.  Then as I prepare my grocery list each week I go to the recipes that I have marked and pick 2-3 out for our meals that week.  I highly recommend a subscription if you don't already have one.

I made this as an appetizer to take to our friends, Scott and Katie, house for a New Years Eve get together.  It was super easy, just dump it all in the food processor or blender and blend.
Katie and Scott at Alex's 30th birthday party 80's theme!

A tip when using fresh lemon or lime juice.  While it is still whole roll it on the counter with firm pressure through your palm.  This will soften it and allow all the juices to come out easier.

Alex was my first taste tester and said it was awesome!  He loved the after kick that it leaves in your mouth.  You can make this salsa as chunky or smooth as you like.  My picky husband prefers smooth vs. chunky. Note from Alex...I will never eat store bought salsa again.  As a man that enjoys chips and salsa I have to say that this is some of the best fresh salsa I have ever had.

Since it is a new year and many people have health related goals to loose weight I thought I might add that spicy foods have been shown to increase metabolism.  No, alone they will not cause you to loose tons of lbs, but it is a good addition to burn a few more calories in your day.

All the ingredients ready to go

Southwest Salsa
Source:  Southern Living Magazine January 2011

  • 1 14.5 oz can diced tomatoes and zesty green chilies (I used a can and half of Rotel original which gave it a nice kick)
  • 5 pickled jalapeño pepper slices
  • 1/4 cup firmly packed fresh cilantro leaves
  • 1/4 cup chopped red onion
  • 1 Tbsp. fresh lime juice (approximately one lime)
  • 1/4 tsp. ground cumin
  • 1/4 tsp. garlic powder
  • 1/4 tsp. dried crushed red pepper
  • 1/4 tsp. salt
Drain liquid from tomatoes, reserving 1 Tbsp. liquid; discard remaining liquid.  Place reserved liquid, tomatoes, and next 8 ingredients in a food processor or blender.  Pulse 5 to 6 times or until finely chopped.  Cover and chill 1 to 24 hours before serving.  Garnish if desired with fresh cilantro sprigs and/or pickled jalapeño slices.  Store in refrigerator for up to 7 days.